Arduino Pong

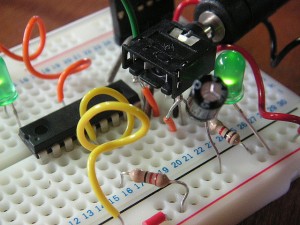
The Arduino is a highly versitile platform, and as such, it also supports Pong. Using three resistors, the sync and light values needed by a TV can be generated. According to the author, Alistair Parker, the Arduino can generate 100-105 pixels per video line, but due to memory restrictions, the actual resolution used is 35×14 pixels. In black-and-white.

As a nostalgic side note, it is worth noticing that such limited resolution and colourspace is enough to provide a challenging game play. All the instructions, including code and schematics are available here.

Posted in Arduino | Comments Off on Arduino Pong

Arduino

The Arduino is one of the flag ship products of the open hardware movement. A simple, microcontroller based motherboard with a well defined pin-out has rendered a whole forest of add-on boards called shields.

But the Arduino movement is not all about hardware. It comes with an easy to use toolchain featuring an IDE for writing and compiling code as well as uploading the results to target. The IDE comes with an easy to use language based on the Wiring. This makes it dead easy to get started with the Arduino. For those of you interested in using C or C++ for development, that is possible too. Wiring uses the gcc-avr toolchain in the end, so the support is already there.

Continue reading

Posted in Arduino, Electronics, Platforms | Comments Off on Arduino

Running Steppers with Arduino

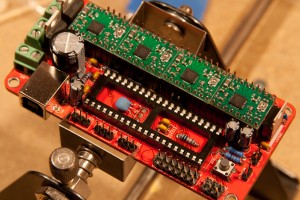
Steppers are fun, so are Arduino. Combining the two means double the fun. Here is a three minute video showing how it is done. The original blog post can be found here.

A great thing about steppers is that they are easy to find. You are likely to find them in old printers, scanners and floppy drives, as well as in photo-copiers and other machines relying on controlling the size of a motion. Another great thing about them is their usefulness – you can build robots, web cam stands and much more.

Posted in Arduino | Comments Off on Running Steppers with Arduino

Component Survey

Some components are found in every design, others are more rare. I’ve met designers claiming that digital constructions not including a PIC must be broken or trivial enough to implement using a single PIC. Still, there are some unique components out there.

For the engineer striving for a truly symmetric world, the WOM is a must. Signetics and National helps us there. For the apocalyptic individuals among us, Maxwell’s Nuclear Event Detector might be of interest. Connect it to trigger the closing mechanism of your bunker and you can sleep tight.

Still, the WOM comes with the most useful figure I’ve encountered yet (thanks to Reine for the tip): number of pins remaining / number of socket insertions.

Posted in Uncategorized | Comments Off on Component Survey

PLA and Temperatures

The eMaker Huxley 3D printer comes with a roll of while PLA from Faberdashery. A material that is new to me (I’ve only printed ABS before). PLA operates at a cooler temperature, but it requires a phase change (from solid to floating), thus requiring quite a lot of energy when in the nozzle.
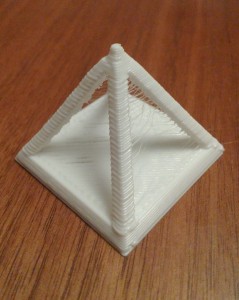
Temperature wise, the nozzle can be set to 190 degrees Celsius. This provides a steady flow and prevents the nozzle from clogging. The illusive bed temperature seems to hide between 65 and 85 dgC. The issue is that the temperature sensor not is placed on the surface of the bed, so the bed needs to be held at a given temperature for a while to let it stabilize. This is well worth considering if you experience good builds at first, then a first layer that has a tendency to peel off.

Right now, I’m aiming at finding a temperature that prevents the bottom layer from peeing of and losing shape due to being too cold. At the same time, I’m trying to configure the cool settings to prevent the hot nozzle from causing small layers to lose shape due to overheat. Notice the tip of the calibration pyramid in the photo in this article (yes, the extruder needs some more calibration love).
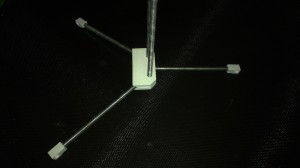
Still, even though the calibration seems to take some time, the progress is nice. Thanks to some filing and gentle force, a stand for a heavy duty filament spool holder is taking shape.

Posted in 3D Printing, eMaker Huxley | Comments Off on PLA and Temperatures

Extruder Issues

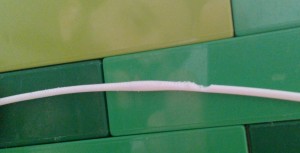
I thought that I ran into an extruder issue yesterday evening. The filament simply got stuck. However, looking at the filament shown in the picture, you can see that the plastic thickens just before (to the left of) the spot where it got stuck and the extruder has eaten into it.

The issue was easily resolved by backing the filament, but the print in question was lost. This highlights the need of a sensor ensuring that the filament actually is moving. Perhaps something that can be constructed from an old mechanical mouse. Had I left the printer alone, it would had eaten its way through the filament, making the operation of backing the filament out of the extrusion head slightly more challenging.

Posted in Uncategorized | Comments Off on Extruder Issues

Adafruit at the Arduino Factory

Adafruit, a great site with projects, forums, a blog and a shop, when to Italy an visited the Arduino factory. They made a video of their trip shown below.

Continue reading

Posted in Arduino | Comments Off on Adafruit at the Arduino Factory

SOPA

Today, there will not be an in-depth article. Instead, I urge you to read up on SOPA/PIPA and make your voice heard.

Posted in Meta | Comments Off on SOPA

EMaker Huxley Wiring

I’ve finally found the time to wire up my EMaker Huxley 3D printer. Let me summarize the experience – trust the images, not the words, sometimes. At other times, the instructions explicitly states that the image is wrong.

Generally, the instructions work well, but certain aspects, such as how to wire up the actual power connector, the orientation of motor connectors and such are lacking. I really did expect a kit build to come with the axes moving in the correctly direction out of the box. Still, only the extruder and Z-axis needed re-orienting. A word of caution – having the X, Y or Z axis moving in the wrong direction means that pressing the home button is a bad idea. Still, manually clicking the end stop prevents any damage.

Posted in 3D Printing, eMaker Huxley | Comments Off on EMaker Huxley Wiring

Lost Knowledge

Past computers did not come with quick start sheets or awkwardly worded manuals that barely scratched the surface of the product. They came with programming manuals, listings of memory maps, I/O registers, schematics and everything else the tinkering engineer might rely on.

The PageTable site contains a literature category, holding many gems. Some of historical interest, others of a more nostalgic nature (German). Now I just need to locate my old PDP manuals and contribute!

Posted in Uncategorized | Comments Off on Lost Knowledge