Prototype Sheild for the Arduino

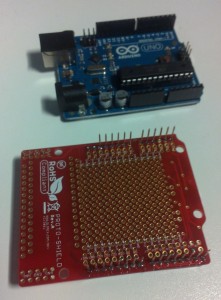
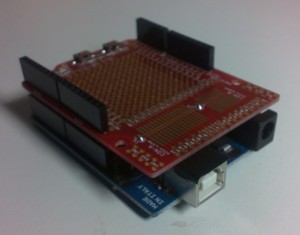
I just bought and soldered up a prototype shield for the Arduino. To be more precise, the Proto Shield from lawicel.

Mounting the pin headers  is a quick job. Then, two pins need to be cut, since they interfere with one of the capacitors on the Arduino. Also, the top of the UBS connector of the Arduino can touch metal on the bottom of the shield. I worked around this by putting some electrical tape on top of it.

Now, all that is left is mounting an array of Darlington transistors and I’ll start running steppers. I just wonder if a small robot running around or a plotting painter bot is the way to go forward.
Posted in Uncategorized | Comments Off on Prototype Sheild for the Arduino

Drawing Waveforms

The Wavedrom tool is an HTML5 based tool for creating timing diagrams. It takes a basic JSON definition as input and produces an SVG waveform as result. To learn more, visit the tutorial, or go directly to the on-line editor. No more excuses for badly drawn timing diagrams!

Via kryptoblog.

Posted in Uncategorized | Comments Off on Drawing Waveforms

Silent – Because Things are Going Great

I just wanted to tell you that the reason for the thin stream of posts recently. It is because I have a lot to do at work. Why is that, you ask? Because things are going great!

I will focus some energy into this site as soon as I have the time. In the mean time, try visiting hack-a-day or makezine for some inspiration!

Posted in Uncategorized | Comments Off on Silent – Because Things are Going Great

Plotting Electronically

For just a few Euros, a basic plotting robot can be constructed. Based on two servos, an Arduino and a pen, it is hard to build a more simple construction than this. From the video, you can see that cheap servos combined with far from ideal mechanics introduced quite a bit of errors into the system. The result can be referred to as artistic – or noicy. Still, the idea of a polar-coordinate-based plotting robot is not new.

Posted in Arduino | Comments Off on Plotting Electronically

Dance to the Beat

Tap to the beat of your favorite song on the switch, and the Arduino will learn and follow. As soon as the beats-per-minute has been calculated, a LED-array will start to animate to the beat. All this is implemented in this Arduino project.

Teaching you about measuring time, the project is interesting from more than an entertainment perspective. Adding bigger lights, more colours and loud music can expand the system’s entertainment potential. Which way you choose to go is up to you.

Posted in Arduino | Comments Off on Dance to the Beat

Japan Edition

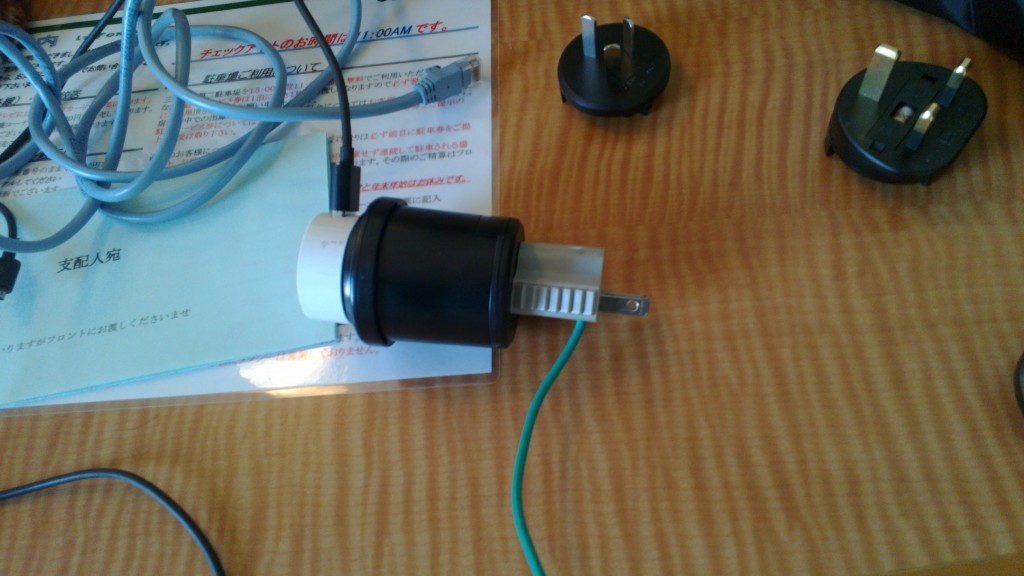
Since I’m in Osaka today, there will be no Wednesday update. I’d just like to take this opportunity to show the wiring involved in charging my phone. The green wire at the bottom of the image is the grounding….

Posted in Uncategorized | Comments Off on Japan Edition

Slot Car Racing

Racing slot cars can be fun, but knowing who’s fastest when requires precision measurement equipment. Enter, an Arduino-based lap timer. The timer detects the cars using an infrared beam and records the lap time. For each track, the best lap of a race and the time for the last lap are shown.

As the timer is aware of the concept of a race, it also provides race start lights. Something that really adds to the atmosphere. The link above not only provides schematics and software – the end result is a impressive model landscape.

Posted in Arduino | Comments Off on Slot Car Racing

Mini-segway using Arduino

Using a small Arduino and a couple of sensors, a segway-like, self-balancing robot can be constructed. The most interesting part of the project is not the construction, but the utilities developed in the project. Using the Arduino2Lego library, Lego NXT components such as motors and sensors, can be used in combination with the Arduino platform.

Posted in Arduino | Comments Off on Mini-segway using Arduino

Arduino – Toolchain

Getting started with the Arduino toolchain is not hard. This week, we will look at the development environment, some tips and tricks for Ubuntu users and, as the grand finale, we will look at working with the Arduino using only plain C.

If you don’t feel like working with C, do not panic. We will start by exploring the IDE and examples provided from the Arduino project.

Continue reading

Posted in Arduino | Comments Off on Arduino – Toolchain

Sanguino

The Sanguino board is a Arduino-derivate offering a more powerful CPU, more pins and more FLASH. All this, while being compatible with existing Arduino software. It is not physically compatible, so shields will not fit.

The core of the Sanguino board is the ATmega644p chip, a bigger brother to the ATmega328 of the Arduino UNO board. The Sanguino board provides, 32 GPIO-pins, 8 analog pins and 6 PWM pins. On the memory side, 64kB of FLASH and 2kB EEPROM provides non-volatile storage, while 4kB of RAM provides space for your stack and variables.

The Sanguino can be bought or built. For the builders, instructions are provided for a soldered custom PCB, a strip-board style construction and even a breadboard version. For the tinkerers out there, a break out sheild is also available. This way, you get easy access to IOs via terminal blocks for attaching your wires.

Posted in Arduino | Comments Off on Sanguino