 The open source family of extruder based 3D printers more or less rely on the same set of tools. Some of the commercial variants may have more polished frontends, but the work flow is still the same. In this article, we have a look at the tools of the trade – from modelling to printing.
The first step to create a 3D printout is to model it. This is done in a 3D CAD application of your choice. There are many alternatives, and the only thing that you really need is a program that is able to produce STL-files.
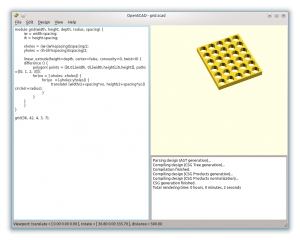
In the open source field, the two main players are Blender and OpenSCAD. Blender is produced by Blender Foundation and is an advanced 3D modelling tool used in games, movies, but also for 3D printing. OpenSCAD is a script driven CAD-for-the-programmer tool written by Clifford Wolf and Marius Kintel.
OpenSCAD produces STL files out of the box. Simply pick Design -> Export as STL… from the menu. For Blender, a relatively new build is needed. There you can export as STL from the File -> Export menu.
In the free-as-in-beer department we find Google SketchUp. This is a nice tool that makes it dead easy to create 3D models. Using various plugins, you can produce STLs. MakerBot Industries has a nice summary of the available options.
In the expensive end of the scale, we find SolidWorks from Dassault Systèmes. In SolidWorks, you can save your models as STL (use Save As, and select STL as file type).
 Before we continue with the next tool in the chain, let’s spend a minute or two understanding the basics of a 3D printer.
There are several 3D printer technologies available, but the RepRap printers and their relatives, are based around the same concept. A small stream of molten plastic is used to “draw” each layer of the object being built. As the plastic is extruded, it cools down and hardens, thus forming a solid three dimensional structure.
To do this, all printers have an extruder head. It is responsible for providing molten plastic on request. This is usually achieved by using a stepper motor to push plastic into a what is known as the “hot end”. The hot end has a small nozzle through which the plastic is extruded onto the printing bed.
The extruder head is slowly moved upwards as the print progresses and the object is built. This is commonly known as the Z axis. The head, or the printing bed, can also be moved freely over the plane under the head. These axes are referred to as the X and Y axes.
There are more tricks to this – for instance heated printing beds can give better results – and some printers even have automatic printing beds that pushes the newly printed objects out of the way when complete. This makes it possible to build multiple items without having to manually start each new job.
The printers movement along the axes, as well as the amount of plastic being extruded, and all parameters are controlled by a script. The script consists of what is known as G-codes.
To generate a G-codes, a tool path is calculated from the STL files (the ones that you got from your CAD software). This requires machine specific calibration, as well as some rather complex algorithms.
Most projects provide some sort of graphical user interface to this process. For instance, ReplicatorG is used by MakerBot’s machines. It can also be used for driving RepRaps. For the command line afficionados, the reprap-utils might be of interest. A common backend for generating the G-code are the Skeinforge tools.
Details on how to use the tools depends on the machine that you plan to use. We will look more at this in the coming weeks.
