When dealing with Qt and OpenGL, there is the problem of where to draw the line. As this tutorial is aimed at being a Qt tutorial, this chapter is based on NeHe's great OpenGL tutorial. For those of you who are interested in the OpenGL, look at the NeHe tutorial. For those of you who want to get OpenGL working in Qt, look here.
This tutorial is based on the first twelve chapters of NeHe's OpenGL tutorial. But first, there are some Qt theory that has to be covered. Qt provides an entire OpenGL module with almost all versions. Some commercial versions do not have it. The module contains a set of classes that encapsulates the interesting parts of OpenGL. In most applications, the QGLWidget class is the only needed class. In this chapter, all code will be based around a class derived from QGLWidget called NeHeWidget. The declaration of NeHeWidget can be seen in example 14-1.
class NeHeWidget : public QGLWidget
{
Q_OBJECT
public:
NeHeWidget( int timerInterval=0, QWidget *parent=0, char *name=0 );
protected:
virtual void initializeGL() = 0;
virtual void resizeGL( int width, int height ) = 0;
virtual void paintGL() = 0;
virtual void keyPressEvent( QKeyEvent *e );
virtual void timeOut();
protected slots:
virtual void timeOutSlot();
private:
QTimer *m_timer;
};
Example 14-1
The widget cannot be instanciated as it contains pure virtual methods, but more about that later. In some NeHe chapters, the graphics are updated by a timer. To facilitate that, a QTimer is used. A QTimer is a class that can be setup to either call a slot once after a given time, or to call a slot at a certain rate specified by an interval. By providing a non-zero timerInterval to the constructor, the timer is setup to call the timeOutSlot with the given interval. The timeOutSlot then calls the timeOut method. The reason for this indirect calling of timeOut, is to avoid having any additional slots (including overloading timeOutSlot) in each of the sub-classes.
The keyPressEvent method handles the escape key and simply closes the window if it encounters it. Later on, sub-classes will override the keyPressEvent again to provide more functionality, but they all call the base class implementation last.
Example 14-2 shows the main function that is used to start all the examples. Each chapter then consists of a specific NeHeWidget implementation named NeHeChapterXX, where XX indicates the NeHe tutorial chapter number.
int main( int argc, char **argv )
{
QApplication a( argc, argv );
NeHeWidget *w = new NeHeChapterXX();
a.setMainWidget( w );
w->show();
return a.exec();
}
Example 14-2
The first chapter of NeHe's tutorial is about setting up OpenGL, and that is taken care of Qt and the QGLWidget. The base code, that is often referred to in the NeHe tutorial is more or less encapsulated in the NeHeWidget class.
In the project files, the line LIBS += -lGLU will have to be changed to LIBS += -lglu32 to work with Microsoft Visual C++.
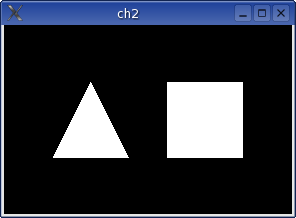
When reading chapter 2 of NeHe's tutorial, it is good to have seen the detailed description of the QGLWidget in the official Qt documentation. The chapter introduces the basics of drawing using OpenGL: vertexes, triangles and quads.
Figure 14-1
The DrawGLScene method of NeHe's tutorial corresponds to Qt's paintGL method. In the same way, resizeGL and initializeGL have corresponding methods in NeHe's base classes. The paintGL method of the NeHeChapter2 class is shown in example 14-3, and can easily be recognized by reading the NeHe tutorial.
void paintGL()
{
glClear(GL_COLOR_BUFFER_BIT | GL_DEPTH_BUFFER_BIT);
glLoadIdentity();
glTranslatef(-1.5f,0.0f,-6.0f);
glBegin(GL_TRIANGLES);
glVertex3f( 0.0f, 1.0f, 0.0f);
glVertex3f(-1.0f,-1.0f, 0.0f);
glVertex3f( 1.0f,-1.0f, 0.0f);
glEnd();
glTranslatef(3.0f,0.0f,0.0f);
glBegin(GL_QUADS);
glVertex3f(-1.0f, 1.0f, 0.0f);
glVertex3f( 1.0f, 1.0f, 0.0f);
glVertex3f( 1.0f,-1.0f, 0.0f);
glVertex3f(-1.0f,-1.0f, 0.0f);
glEnd();
}
Example 14-3
Chapter 3 introduces how to use the glColor3f method to set the current color. It also shows how setting the color and creating several vertexes gives those vertexes the same color. The NeHeChapter3 class is identical to the class of chapter two except for the addition of glColor3f calls in the paintGL method.
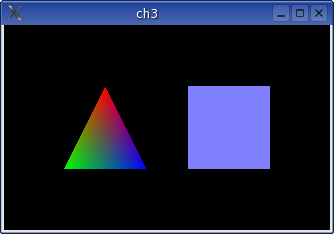
Figure 14-2
In chapter 4, motion is introduced. Example 14-4 shows the interesting parts of the NeHeChapter4 class.

Figure 14-3
class NeHeChapter4 : public NeHeWidget
{
private:
GLfloat rtri, rquad;
public:
NeHeChapter4( QWidget *parent=0, char *name=0 ) : NeHeWidget( 50, parent, name )
{
rtri = rquad = 0.0f;
}
protected:
void paintGL()
{
glClear(GL_COLOR_BUFFER_BIT | GL_DEPTH_BUFFER_BIT);
glLoadIdentity();
glTranslatef(-1.5f,0.0f,-6.0f);
glRotatef(rtri,0.0f,1.0f,0.0f);
...
glLoadIdentity();
glTranslatef(1.5f,0.0f,-6.0f);
glRotatef(rquad,1.0f,0.0f,0.0f);
...
}
void timeOut()
{
rtri += 0.5f;
rquad -= 0.25f;
updateGL();
}
};
Example 14-4
In the NeHe example code, the rtri and rquad values are updated after each paint operation. In the Qt version, the timer does this and then calls the updateGL method that schedules the repainting. This approach makes the animation run at the same pace, independent of the framerate.
Chapter 5 introduces true 3D objects. In the earlier chapters flat objects in 3D space have been discussed, now a box and a pyramid are shown. The code is almost identical to chapter 4.
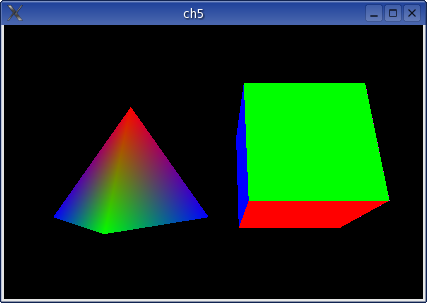
Figure 14-4
In chapter 6, interesting things are happening: Texturing is introduced. Here, there are some Qt peculiarities that needs to be taken care of.
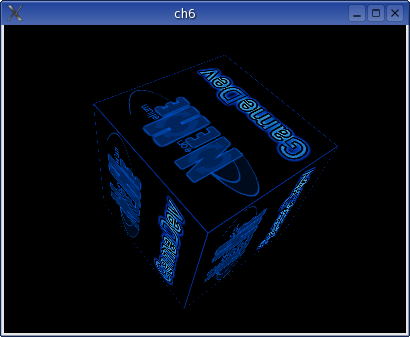
Figure 14-5
In example 14-6, the code for loading images and binding them to textures is shown. Notice that the QImage class has support for an OpenGL friendly format. The loadGLTextures method is called from the initializeGL method.
void NeHeChapter6::loadGLTextures()
{
QImage t;
QImage b;
if ( !b.load( "../images/nehe.bmp" ) )
{
b = QImage( 16, 16, 32 );
b.fill( Qt::green.rgb() );
}
t = QGLWidget::convertToGLFormat( b );
glGenTextures( 1, &texture[0] );
glBindTexture( GL_TEXTURE_2D, texture[0] );
glTexImage2D( GL_TEXTURE_2D, 0, 3, t.width(), t.height(), 0, GL_RGBA, GL_UNSIGNED_BYTE, t.bits() );
glTexParameteri( GL_TEXTURE_2D, GL_TEXTURE_MIN_FILTER, GL_LINEAR );
glTexParameteri( GL_TEXTURE_2D, GL_TEXTURE_MAG_FILTER, GL_LINEAR );
}
Example 14-6
Chapter 7 introduces lighting, texture filters and keyboard controlled movements.
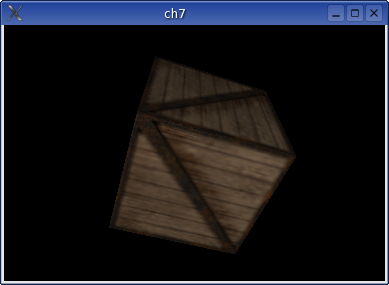
Figure 14-6
The code looks very much like the code for chapter six, but with some changes in loadGLTextures, and a brand new, overloaded version of keyPressEvent. Parts of the new version is shown in example 14-7.
void keyPressEvent( QKeyEvent *e )
{
switch( e->key() )
{
case Qt::Key_L:
light = !light;
if( light )
glEnable( GL_LIGHTING );
else
glDisable( GL_LIGHTING );
break;
case Qt::Key_F:
filter++;
if( filter > 2 )
filter = 0;
break;
case Qt::Key_Left:
droty -= 0.01f;
break;
...
default:
NeHeWidget::keyPressEvent( e );
}
}
Example 14-7
Using this approach, we use Qt's mechanism for keyboard events, instead of relying on the keys-array used in the NeHe tutorial.
In chapter 8 the blending effect is introduced. The code is just like the previous chapter, but with an additional flag for turning the blending on and off.
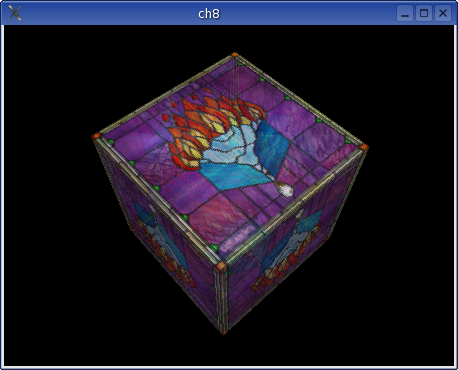
Figure 14-7
Chapter 9 starts to use lighting and blending to build more complex effects. In this case, twinkling stars in a rotating sprial.
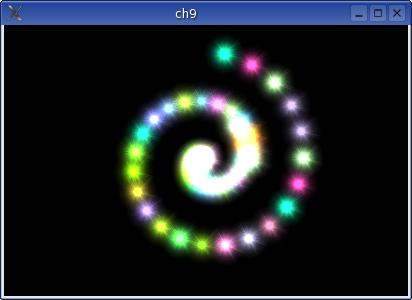
Figure 14-8
The updating of the position of each star is handled in the timeOut method. Apart from that, the code is a mixture of the Qt version of chapter eight and the NeHe code of chapter nine.
In chapter 10 a model of a world is loaded and the user can move in it from a first person perspective.
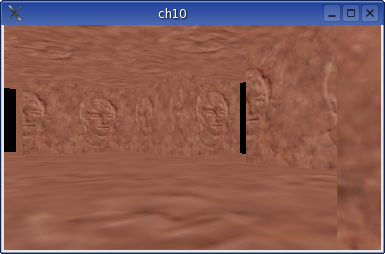
Figure 14-0
The code of this chapter is different from the earlier chapters. There is no timer involved, instead each movement triggers a call to updateGL that redraws the scene.
The biggest change from the NeHe version is the file handling. The world model is loaded in the loadTriangles method shown in example 14-8. The C methods of the NeHe version have been replaced by the corresponding Qt methods. This makes the handling more robust.
void loadTriangles()
{
QFile f( "world.txt" );
if( f.open( IO_ReadOnly ) )
{
QTextStream ts( &f );
Vertex v[3];
int vcount = 0;
bool allok, ok;
while( !ts.atEnd() )
{
QStringList line = QStringList::split( " ", ts.readLine().simplifyWhiteSpace() );
if( line.count() == 5 )
{
allok = true;
v[vcount].x = line[0].toFloat( &ok );
allok &= ok;
v[vcount].y = line[1].toFloat( &ok );
allok &= ok;
v[vcount].z = line[2].toFloat( &ok );
allok &= ok;
v[vcount].u = line[3].toFloat( &ok );
allok &= ok;
v[vcount].v = line[4].toFloat( &ok );
allok &= ok;
if( allok )
vcount++;
if( vcount == 3 )
{
vcount = 0;
Triangle t;
t.vertex[0] = v[0];
t.vertex[1] = v[1];
t.vertex[2] = v[2];
triangles.append( t );
}
}
}
f.close();
}
}
Example 14-8
Chapter 11 implements a flag effect. An image is mapped onto a surface that "waves in the wind". The code is pretty straight forward and the points that build the surface are updated in the timeOut method.
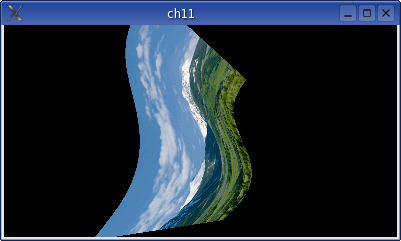
Figure 14-10
In chapter 12 call-lists are introduced. This is a way to build lists of OpenGL calls into a list. This list can then be invoked to replay the list of calls.
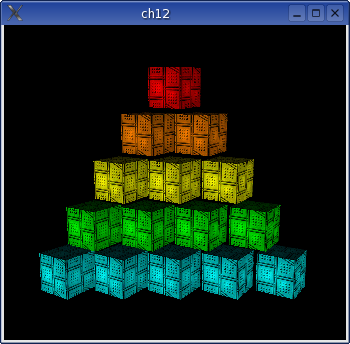
Figure 14-11
This is the final chapter of this tutorial. If you want to see more chapters ported to Qt, feel free to contact me. My hope is that you can do it your self by looking at the code for these chapters. The entire source code can be downloaded from here.
This is a part of digitalfanatics.org and is valid XHTML.
Copyright (c) 2002-2004 by Johan Thelin (e8johan -at- digitalfanatics.org). This material may be distributed only subject to the terms and conditions set forth in the Open Publication License, v1.0 (local copy) or later (the latest version is presently available at http://www.opencontent.org/openpub/). Distribution of substantively modified versions of this document is prohibited without the explicit permission of the copyright holder. Distribution of the work or derivative of the work in any standard (paper) book form is prohibited unless prior permission is obtained from the copyright holder.